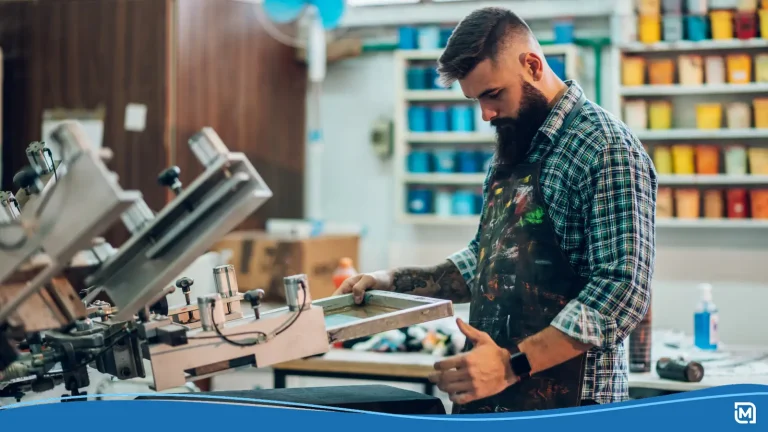
Designing your own t-shirt can be one of the most fun and rewarding creative projects. Customized apparel is a great promotional tool, particularly for small businesses looking to grow their brand and gain exposure. Learning how to design t-shirts with a custom logo is a skill that blends creativity, strategy, and a touch of technical know-how.
In this article, we’ll go over everything you need to know about designing your own custom t-shirts, from the initial planning phase to when your print t-shirts are delivered.
- Defining Your T-Shirt’s Purpose & Target Audience
- Inspiration & Research: Fuel Your Creativity
- Choosing Colors That Pop
- Typography Tips for Your Logo & Shirt Designs
- Master Logo Design for T-Shirts with AI Tools
- Perfect Logo Placement: The Complete Technical Guide
- Understanding Sizes & Fits
- Printing Options Deep Dive
- Design Evaluation & Quality Assurance
Defining Your T-Shirt’s Purpose & Target Audience
Before you dive into creating dazzling graphics or picking colors, you need to ask yourself one big question: Why am I designing this t-shirt? Grasping the purpose of your design and knowing your audience will save you time, money, and headaches down the line.
Identify Your T-Shirt Goals
Are you looking to launch a small business selling custom t-shirts, or are these tees just for a one-off event like a reunion, sports team, or celebration? Your goals will shape every part of your design and printing process.
For instance, if your goal is to create a t-shirt business, you’ll want designs that have broad appeal, high-quality graphics, and longevity.
On the other hand, if your goal is just a fun project for friends or family, you can lean into quirky, personalized designs with your own photos or fun slogans.
Know Your Audience & Design Accordingly
Your audience can be as broad as “everyone who likes t-shirts” or as specific as “college students who love retro graphic tees.” Knowing who will wear your custom t-shirt informs your t-shirt design ideas, color palette, style, and even fabric choice.
Ask yourself:
- Who will wear the shirt?
- What style do they like? Casual, sporty, trendy?
- Will they appreciate detailed graphics or prefer simple designs?
Understanding your audience ensures your final design resonates and makes people proud to wear your shirt.
Setting Your Budget & Quantity Strategy
Before you pick a printing option or start designing, think about your budget and the number of shirts you plan to order. Upfront costs vary depending on printing methods, shirt quality, and quantity.
For example, screen printing is cost-effective for larger orders with multiple colors, while direct-to-garment (DTG) printing shines for smaller quantities or designs with high-resolution, detailed graphics. Your budget strategy also affects whether you opt for premium fabrics like cotton or more economical options.
Inspiration & Research: Fuel Your Creativity
After you establish your goals and desired audience, it’s important to take time and gather inspiration for your t-shirt design. Great ideas don’t just appear out of thin air; they often come from observing what works, what people love, and what feels current.
Starting with research can help you personalize your custom t-shirts and ensure your designs stand out in a crowded market.
One of the easiest ways to start is by looking at t-shirt design ideas online. Platforms like Pinterest, Instagram, Etsy, and even TikTok are goldmines for seeing what’s trending. Pay attention to styles that resonate with your target audience: are bold, detailed graphics catching the eye, or are simple designs and minimalist logos dominating the space? Notice what kinds of fonts, colors, and compositions are popular and think about how you could put your own twist on them.
Next, explore other popular custom t-shirts in the market. Online stores often showcase how different printing options, fabric colors, and garment types affect the final product. Seeing real-world examples gives you insight into what works technically and aesthetically, helping you match your design to the right shirt.
Take Advantage of Templates for Design Inspiration
Don’t overlook the power of templates and mockups in design tools like LogoMaker. Templates aren’t meant to limit creativity; they’re a springboard. They help you visualize layout, logo placement, and proportions, and they can spark new ideas for combining fonts, artwork, and color schemes. Experimenting with templates also allows you to see how different design elements interact before committing to a final design.
Things to Keep in Mind During the Research Phase
When researching, pay close attention to three main factors:
- Trends in fabric color and style: Some colors might be seasonal or target-specific, like earthy tones for eco-conscious buyers or vibrant neon for fun, youthful designs. Fabric texture and shirt style (crew neck, v-neck, or long sleeves) also influence how your design will look.
- Popular fonts and artwork: Typography sets the tone of your shirt. Is it bold and playful, sleek and modern, or handwritten and whimsical? Pairing the right fonts with complementary graphics can make a shirt feel cohesive and professional.
- Effective logo placement on tees: Observe how logos and artwork are positioned on shirts. Placement affects readability, comfort, and style. Should your logo be center-chest, on the sleeve, or near the hem? What works best for the type of design you’re envisioning?
Finally, don’t just copy what’s trending; use it as inspiration to develop your unique style. Researching ensures that your design feels fresh, thoughtful, and purposeful. By the end of this step, you’ll have a clear vision and a collection of ideas that will guide your custom t-shirt design process from start to finish.
Choosing Colors That Pop
Color is one of the most powerful tools in custom t-shirt design, and it can literally make or break your shirt. It has been scientifically proven that color can affect your mood. The right color combination grabs attention, conveys the right emotions, and ensures your logo or graphics are clearly visible. When planning your palette, it’s important to consider three primary factors: fabric color, brand colors, and contrast/visibility.
Fabric Color: Match Your Design to the Shirt
The color of your shirt’s fabric sets the stage for your design. Light-colored designs stand out beautifully on dark shirts, while dark designs really pop on lighter fabrics. For example:
- A white or pastel logo looks striking on a black or navy shirt.
- A black or dark-colored design is easier to see on light gray, white, or cream fabrics.
Also, consider how your shirt’s material affects color perception. Cotton absorbs ink differently than polyester or blends, so colors may appear slightly different in real life than on your computer screen. Always order a sample print to make sure your colors come out exactly as planned.
Brand Colors: Keep It Consistent
If your custom t-shirt design represents a brand, company, or team, consistency is decisive. Using your established brand colors in your logo and shirt design strengthens brand recognition and helps your tees feel professional. Even if your design includes multiple colors, make sure the main elements align with your brand palette.
Don’t be afraid to experiment with complementary colors, but always check that the overall design still reflects your brand identity.
Contrast & Visibility: Make Your Graphics Stand Out
Your design should be visible from a distance. High contrast between your logo or artwork and the shirt fabric ensures that even detailed graphics are easy to see. For example:
- Avoid light gray ink on a light gray shirt; it blends in and becomes hard to read.
- Use bold outlines or shadows for detailed illustrations to make them pop.
- Keep small text or intricate patterns simple so they remain legible.
Choosing colors carefully is not just about aesthetics; it’s about making sure your custom t-shirt design communicates clearly, attracts attention, and looks professional. A little thought in this stage goes a long way toward creating shirts that people will love to wear and show off.
Typography Tips for Your Logo & Shirt Designs
Typography is much more important than people give it credit for. It’s a powerful design element that conveys style, mood, and personality. In a custom t-shirt design, your choice of fonts can elevate a shirt from ordinary to memorable.
Readability: Make Every Word Count
The most important rule in typography is readability. Your text needs to be legible from a distance and across different shirt sizes. For instance:
- Small text on a kids’ tee may become unreadable if it’s too intricate.
- Highly decorative or experimental fonts can look beautiful, but may be hard to read on dark fabrics or in small sizes.
A good rule of thumb is to test your font at the size it will appear on the shirt, and if you have multiple sizes (like men’s, women’s, and kids’ shirts), double-check that it’s readable on each.
Font Pairing: Keep It Simple
When combining fonts, less is more. Limit yourself to 2–3 fonts to avoid visual clutter. Common strategies include:
- Heading + body: Use a bold font for the main logo or slogan, and a simpler font for any smaller supporting text.
- Contrast pairing: Pair a playful, decorative font with a clean sans-serif font for balance.
- Hierarchy: Larger or bolder fonts should communicate the most important information, while smaller fonts provide context.
Too many fonts can make your shirt design look chaotic, confusing the viewer and diluting your brand or message.
Style Match: Align Fonts with Your Shirt Theme
Your font choice should reflect the overall style and mood of your design. Consider the vibe you want your shirt to convey:
- Playful and fun: Rounded, hand-drawn, or quirky fonts work well for casual or event shirts.
- Professional and modern: Sleek sans-serif fonts communicate sophistication and work well for company merchandise.
- Bold and impactful: Heavy, all-caps fonts grab attention, perfect for team jerseys or statement tees.
- Minimalist and clean: Simple fonts with subtle weight variations suit contemporary and versatile designs.
Matching fonts to the shirt’s theme ensures your custom t-shirt design communicates your intended message clearly and resonates with your audience.
Master Logo Design for T-Shirts with AI Tools
A custom logo is the centerpiece of most t-shirt designs. Whether it’s for a brand, team, or personal occasion, your logo should be memorable, scalable, and visually appealing. Luckily, AI-powered design tools make this process easier than ever.
Logo Design Fundamentals for Apparel
When designing a logo for a shirt, think about:
- Simplicity: Simple logos are easier to read and print, especially on fabric.
- Versatility: Can it look great on different shirt colors and sizes?
- High resolution: Your logo should be high resolution so it’s crisp, whether printed on a small pocket or across the chest.
- Scalability: A vector file ensures your design can scale without losing quality.
Even if you’re just starting, these principles will help you create custom t-shirt designs that stand out.
Creating T-Shirt Logos with AI
AI tools like LogoMaker let you start designing quickly, even if you’re not a professional designer. You can upload your own photos, choose fonts, experiment with colors, and explore t-shirt options using pre-made templates.
If you want an amazing company logo to put on your custom t-shirts, LogoMaker‘s AI-powered logo design suite has over 10,000 unique design templates that you can use to design a custom professional logo in just minutes.
Logo File Preparation for Printing
Once your logo is ready, it’s crucial to prepare your files properly. Printers often accept PNG, SVG, EPS, or AI formats, with transparent backgrounds for flexible placement. Always double-check:
- Resolution: 300 dpi is standard for printing.
- Color mode: CMYK is ideal for print; RGB is mostly for screens.
- File size: Ensure the file is not too large for your printer’s system.
Proper preparation prevents headaches and ensures your own design comes out crisp and vibrant.
Perfect Logo Placement: The Complete Technical Guide
Where your logo sits on a t-shirt is just as substantial as the design itself. Placement affects how the print t-shirt looks and how comfortable it is to wear.
Center Chest Placement
The center chest is the most common and versatile placement. It works well for logos, slogans, and graphics. Consider:
- Standard distance: About 3 inches below the collar for adults.
- Balance: Keep the logo centered horizontally.
- Size: A typical logo ranges from 8–12 inches wide.
This placement is perfect for brand recognition and works well on both short and long-sleeved shirts.
Alternative Placement Options
Want to stand out? Try creative placements:
- Pocket area: Small logos on the left chest are subtle yet stylish.
- Sleeves: Great for team logos or sponsors.
- Back: Full-back graphics make a bold statement.
- Hem or bottom corner: Adds a unique, modern twist.
Multi-Logo Layouts & Combinations
Sometimes, one logo isn’t enough. If your shirt represents a brand and a team, or you’re celebrating an event with multiple sponsors, you’ll want a layout strategy.
- Prioritize your main logo.
- Position secondary logos smaller or on sleeves.
- Ensure balance and avoid clutter.
Size Specifications by Shirt Type
Different shirt styles affect logo size. For example:
- Kids’ tees: Reduce the logo proportionally.
- Tank tops: Center placement works best due to limited space.
- Oversized shirts: Larger designs maintain visual impact.
Understanding Sizes & Fits
Offering the perfect fit is just as crucial as designing a visually stunning t-shirt. No matter how amazing your custom t-shirt design or logo looks, if the shirt doesn’t fit well, people won’t want to wear it.
Men’s, Women’s & Kids’ Sizing Charts
Different demographics require different sizing standards. For inclusivity and accessibility, it’s important to provide accurate size options for:
- Men’s shirts: Often slightly wider in the shoulders and longer in the torso. Common fits include classic, slim, and athletic.
- Women’s shirts: Typically narrower in the waist and shorter in length, with options like fitted, relaxed, or oversized styles.
- Kids’ shirts: Sizing can vary significantly by age, so check the manufacturer’s charts carefully to ensure a comfortable fit.
Providing clear sizing charts on your website or product listings helps customers choose the right size the first time, reducing returns and increasing satisfaction.
Different Cuts & Styles: Slim, Classic, Oversized
The style and cut of a shirt influence both comfort and how your logo or graphics appear. Some common options include:
- Slim fit: Tapered for a more tailored look. Great for modern, trendy designs, but may limit movement for some wearers.
- Classic fit: A versatile, roomy option that works well for most people and logo placements.
- Oversized: Popular for casual, streetwear, or unisex designs. Keep in mind that logos may appear smaller relative to the shirt’s larger surface area, so adjust your artwork accordingly.
Understanding these differences allows you to match your design to the shirt style, ensuring your design looks intentional and well-proportioned.
Printing Options Deep Dive
Choosing the right printing method affects color vibrancy, durability, texture, cost, and fabric compatibility. Understanding the strengths and limitations of each option ensures your design looks professional and meets your goals.
Screen Printing: Bulk Orders & Vibrant Colors
Screen printing is one of the most popular methods for custom shirts, especially when producing large quantities. In this process, ink is pushed through a stencil (screen) onto the fabric.
Advantages:
- Vibrant colors: Ideal for designs with multiple colors, solid graphics, or bold logos.
- Durable prints: With proper care, screen-printed designs last for years without fading.
- Cost-effective for bulk orders: The more shirts you print, the lower the cost per shirt.
Considerations:
- Upfront costs are higher for small orders because each color requires its own screen.
- Best suited for simple designs or limited colors; very detailed gradients or photographic prints are harder to achieve.
- Works well on cotton and cotton-blend fabrics, but color may appear slightly different on polyester.
Direct to Garment (DTG): Detailed Graphics & Photos
Direct-to-Garment (DTG) printing is like using a high-end inkjet printer directly on fabric. It’s ideal for complex, full-color designs and photorealistic artwork.
Advantages:
- High res: Prints high-resolution, detailed graphics and photos with smooth color gradients.
- No setup cost for different colors: This makes it great for short runs or print-on-demand.
- Variety: Works on various fabrics, especially cotton, and produces a soft feel on the shirt.
Considerations:
- Not as cost-effective for bulk orders compared to screen printing.
- Color vibrancy may be slightly muted on dark fabrics unless a white underbase is used.
- Works best on 100% cotton; blends or synthetic fabrics may affect ink absorption.
Embroidery: Texture & Premium Feel
Embroidery uses thread stitched into the fabric, giving a tactile, textured finish. It’s often used for logos, monograms, or premium apparel.
Advantages:
- High-quality feel: Adds a premium, professional feel to any design.
- Durable: A long-lasting option that often outlasts screen-printed graphics.
- Different types of apparel: Works well on jackets, hats, and thicker garments in addition to t-shirts.
Considerations:
- Best for small, simple logos rather than intricate, highly detailed graphics.
- Slightly higher upfront costs per shirt compared to printing.
- Thread colors may vary slightly between batches, so consistency is instrumental.
Heat Transfer & Vinyl: Personalized & Small Batches
Heat transfer involves printing a design onto a special transfer paper and then using heat to apply it to the shirt. Vinyl is a type of heat transfer material that creates crisp, raised designs.
Advantages:
- Small batches: Perfect for small batches, custom fonts, or personalized shirts.
- Variety of images: Works with photos, text, and detailed graphics.
- Easy to experiment: Try out different colors and styles without high setup costs.
Considerations:
- Less durable than screen printing or embroidery; designs may crack or peel over time if not cared for properly.
- Works best on cotton or cotton-blend fabrics.
- Layering multiple vinyl colors can be tricky for complex designs.
Cost, Fabric Compatibility & Final Design Outcomes
When choosing a printing method, consider the following main factors:
- Cost: Screen printing is more cost-effective for bulk orders; DTG and heat transfer are better for small runs or custom designs.
- Fabric compatibility: Cotton is the easiest to work with across all printing methods, while polyester or blends may require special inks or adjustments.
- Design complexity: DTG handles detailed graphics and photos best; screen printing shines with bold, simple designs, and embroidery works for logos and text.
- Feel and texture: Screen printing sits on top of the fabric, DTG is soft, and embroidery adds texture and dimension.
By understanding these factors, you can match your design to the right method, ensuring that your custom t-shirt design not only looks amazing but is also comfortable, durable, and professional.
Design Evaluation & Quality Assurance
Creating a custom t-shirt design doesn’t end once your artwork is finalized. To ensure your shirts look professional, fit well, and appeal to your audience, thorough design evaluation and quality assurance are essential. This step prevents costly mistakes, maintains brand integrity, and ensures your customers or team members will be proud to wear your shirts.
Technical Quality Checklist
Before sharing or selling your shirts, carefully review the following technical aspects:
- High resolution and no pixelation: Check that all graphics and logos are at least 300 dpi for crisp, clear printing. This is especially worth noting for detailed graphics or images created from own photos.
- Correct placement on the garment: Verify that logos, text, and artwork are positioned properly on each shirt type. A mockup or sample print can help ensure consistent placement.
- Color fidelity matches your intended fabric color: Colors can look different on screen versus fabric. Always compare printed samples to your design preview to confirm accuracy.
- Proper size scaling for all shirt types: Ensure your design looks proportional on men’s, women’s, and kids’ sizes, and consider how oversized or fitted shirts affect the design’s appearance.
- Offering multiple design shirts in different colors: Test your design on a variety of fabric colors to ensure visibility and appeal. Some designs may pop on dark fabrics but fade on lighter ones.
- Order prints in bulk or via print-on-demand: Depending on your goals and upfront costs, decide whether to produce a small batch first or order larger quantities for wider distribution.
A careful review against this checklist ensures that your final design maintains quality and looks professional in every detail.
Market Testing & Feedback
Even the most polished design can benefit from real-world testing. Before committing to mass production, gather feedback to refine your design:
- Friends or target audience: Ask people who represent your ideal audience to try on shirts, review the design, and provide honest feedback.
- Social media polls: Share mockups or photos of your designs online to gauge interest and collect opinions from a wider audience.
- Small batch orders to gauge interest: Printing a few shirts first allows you to see how the design performs in real life, from wear and wash durability to overall aesthetic appeal.
Final Production Preparation
Once your design has passed technical checks and market testing, it’s time for the final production phase:
- Confirm quantities and sizes needed: Use insights from testing to determine the exact mix of sizes, colors, and styles for your order.
- Double-check logos, fonts, and graphics: Ensure every file is the correct format, resolution, and color mode before sending to the printer.
- Confirm with the printer and order your batch: Communicate any special instructions, such as placement adjustments or printing techniques, to guarantee consistency and quality across all shirts.
Conclusion
By following this guide, you can confidently create your own t-shirt, whether it’s for a small business, a team, a special event, or just for fun. Remember, the main thing is to start designing with a clear vision, pay attention to small details, and make sure your final design is polished and ready to impress.
Create your own custom t-shirts using LogoMaker’s easy-to-use t-shirt design process. If you need a logo to go on your t-shirt, simply use our innovative AI-Powered logo design platform and create an amazing logo in minutes. Get started today!

FREQUENTLY ASKED QUESTIONS
How do I start designing my own t-shirt?
Start by defining your purpose and audience, then explore free templates or AI tools like LogoMaker to create your logo and start designing.
What printing method is best for multiple colors?
Screen printing is ideal for multiple colors and larger orders. For small, full-color designs, direct-to-garment (DTG) is better.
Can I print my own photos on a t-shirt?
Yes! Use DTG or heat transfer for high-resolution photos. Make sure your images are high resolution and prepared in the correct format.
How do I choose the right t-shirt fabric?
Cotton is soft and breathable. Polyester retains color well, especially for sportswear. Blends offer durability and comfort.
What size should my logo be?
For center chest, logos are typically 8–12 inches wide. Adjust proportionally for kids’ tees or tank tops.
How do I check quality before ordering in bulk?
Request a sample print, check for color accuracy, placement, and logo clarity, and gather feedback from your target audience.